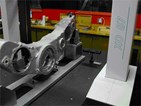
Aerospace Component And Gear Box Manufacturer, Bradley-Thompson Tool Company, Installs New Wenzel CMM With Scanning Probe And OPENDMIS Software

When Bradley-Thompson Tool Company received an order to machine a large number of aerospace gear box castings new measuring capability was required…and Xspect Solutions met the challenge with the right Wenzel CMM, the necessary accessories and immediate software assistance.
Markets served have been a renaissance for Southfield, Michigan-based Bradley-Thompson Tool Company, who in recent years has focused their precision machining know-how on the aerospace industry…in particular, complex gear box castings.
"We've been successful in carving out a niche for ourselves on specific parts like gear boxes, without having multi-million dollar machining centers to do it," says Art Watson co-owner of Bradley-Thompson. What we do have is tremendous machining and toolmaking experience born out of many years of designing, building and manufacturing parts and machining systems for the automotive industry. What our global aerospace customers have been impressed with here, right on 8 mile road in Detroit, has been our ability to accurately and consistently produce their complex parts on time, at a reasonable cost, with the tolerances and specifications they require. Like many aerospace suppliers, we first became involved by manufacturing service parts which ultimately provided us the opportunity to quote on OE components. We are ISO9000 and AS9100 certified."
Jeff Sutter, Bradley-Thompson's other owner, points out, "Machining know-how notwithstanding, none of this aerospace business would have been possible without having advanced CMM measuring capability to help us develop the best machining process. For many years we used a smaller Starrett Rapid Check CMM to do all our measuring work. But that machine was not sophisticated enough for inspecting multiple bores on gear box housings, nor did it have the ability to guide us in developing the type of interpolation processes that we use to accurately machine the bores."
Sutter explains further, "We knew that the size and type of CMM we needed would be pushing the envelope of our capital expenditure budget. Actually we were thinking we would could only afford a previously owned machine. We looked for a CMM manufacturer that was close in proximity, because we are a small company and we only have one CMM technician. Our technician, however, is very capable and knowledgeable with DMIS software, so we wanted to make sure that if there was a change in software with a new machine, it would be an easy transition for him. Lucky for us, Xspect Solutions was located just a short distance away in the Detroit metropolitan area, so we made a visit…and that is basically all it took. We discussed our needs and they worked with us to be able to provide a brand new X-Orbit 87 Wenzel CMM with both standard and scanning Renishaw probes and OpenDMIS software. This gave us a very high quality all granite machine with intrinsic precision hemispherical-cylindrical air bearings and volumetric accuracy of 2.5 microns. The working relationship has been excellent and the assistance we were provided in training and even helping us in writing some of the initial programs has been invaluable."
Brian Wehrs, Bradley-Thompson's CMM technician says, "We were under the gun from our newest customer when we originally purchased the Wenzel CMM. We actually took a gear box part over to Xspect Solutions and put it on one of their demo scanning CMMs and made graphical outputs of the gear box and the bores so we could write the programs for machining and inspecting them right there on the spot. Since that time, I have completed the OpenDMIS training and love many of the advance features that it has. I particularly like the drop-and-drag capabilities as well as the ability to preview machine movement. Also, the machine came equipped with a styli change rack which is a very nice accessory to have. We added an SPC module to the software package to provide the additional reporting data typically required by our customers."
The X-Orbit 8.10.7 is one of the new economical lines of Wenzel CMMs and has been designed and built to intrinsic accuracy and to exacting and rugged machine tool standards. It has a measuring range (X-Y-Z axes) of 31.5-inches x 39.4-inches x 27.6- inches. It has a measuring speed of 700 mm/sec with maximum acceleration of 2,000mm/sec2 . It utilizes the industry standard Renishaw PH10 and SP25-1 scanning probing systems and offers volumetric accuracy of 2.5 microns.
SOURCE: Bradley-Thompson Tool Company
